Continuing the Renovation – Interior upgrades

Now that the Chinook was home safe, the coming winter provided a window to prepare her for trips after retirement in a couple of months.  We bought the RV at a very good price, but that’s because she was something of a “fixer-upper”.  Time to fix-up.

At this time, I still wasn’t sure how committed we would be to the RV lifestyle, so I was concentrating on cost for the needed improvements.  Sweat-equity was cheap, so I did everything myself, and did some bargain-hunting for solutions.  I wasn’t concerned with restoring the Chinook to a brand-new state.  Rather, I wanted to repair the obvious flaws and make her presentable.
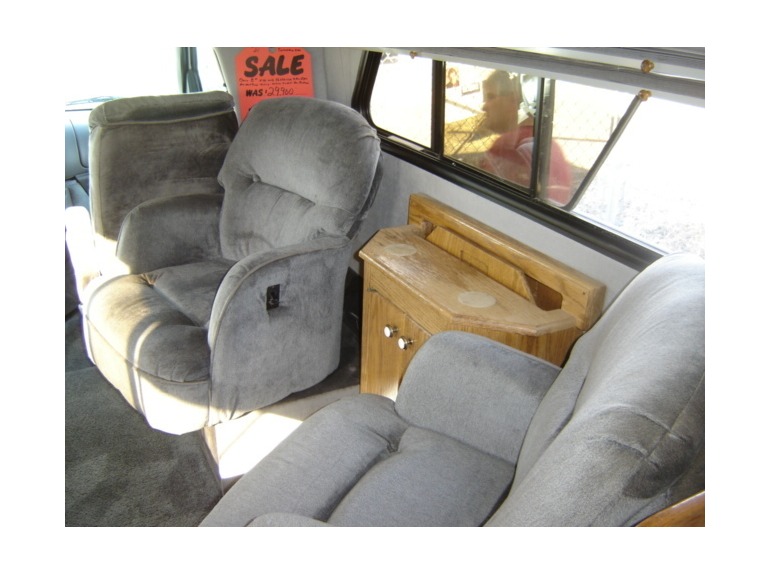
Woodwork

imag0385
Refinishing Wine Rack and Dining Table in Garage

The interior woodwork was in obvious need of refinishing, especially the wine cabinet/dining room table.  The top surface and cork coasters were weather-worn, and the varnish was peeling.  Fortunately peeling varnish is easy to strip, so I was able to restore the table by stripping, sanding, staining and varnishing, back to its original luster.  I found some new cork circles on Etsy to replace the nearly disintegrated originals.  I attached the new coasters to the refinished cabinet using rubber cement.  The remaining woodwork did not need to be stripped, all they needed was some new coats of varnish.

Restored Dining Table
Restored Wine Cabinet and Coasters

For some reason, one of the original spice rack shelves was removed by a previous owner.

New Spice Rack Shelf

From pictures on the Internet and finish marks in the remaining shelf, I was able to determine the size and shape of the missing shelf and I was able to build a replacement, using a red oak project board from the hardware store, and some oak trim left over from a previous shelf project.  I purchased some pre-made wood spindles on-line for the rail mounting.


The rest of the woodwork was pretty straightforward.  I removed the closet door, and most of the lower cabinet doors and stripped the varnish, sanded if needed, and re-stained and re-varnished.

New Spice Rack installed

The upper cabinet doors, and trim were still in pretty good shape, so I added a coat of varnish where it was needed.


The original Mr. Coffee under-counter coffee maker was missing, but the previous owners left a similar Black and Decker unit in the cabinets.  It turns out to be quite difficult to find similar new units or parts, so I searched far and wide for the mounting brackets for the Black and Decker coffee maker.  I eventually located them in an appliance part warehouse online and mounted the coffee maker in place of the original.  Coffee is an important part of my retirement life and our camping trips, so this particular feature was important.  After we “ejected” the glass coffee pot from the coffee maker during some hard braking, I installed a safety rope for the decanter.  I screwed in two small cup hooks on either side of the coffee maker and cut a small piece of 1/8″ nylon rope with loops on each end.  The rope goes around the coffee maker and through the handle while driving and the loops connect to the hooks on the sides, holding the pot in place.  Since the coffee maker requires 120V power (shore power or generator), we purchased a glass stove top tea kettle and a French press for making coffee when 120V power is not available.

TV and Sound System Upgrades

The original Chinook TVs (13″ CRTs) may have been a luxury feature in their time, but are hopelessly outdated today.

New TV Back Panel and Mounting Bracket

Flat screen 12v TVs combine high-definition quality with low power consumption, which is ideal for an RV application.  Still operating on a budget, I chose a 15″ Axess HDTV with a built-in DVD player.  The 15 inch screen was almost equivalent to the original 13″ CRT.  In hindsight, I would probably have gone a size or two higher, but the small size makes the TV very light weight and does not need any extra securing during driving.  This TV also has a narrow viewing angle, so we have to tilt it down a lot when we watch from the sofa bed at night.

New TV installed and tucked back for travel.

In order to mount the TV, I built an oak-finish panel from an old cabinet board and filled in the opening, and covered the border with the original frame, so it maintains the built-in look.  I bought a small folding TV wall bracket and mounted it to the back board, which allows the TV to be tilted and swiveled depending on where we are watching from (sofa, or club chairs).


A major drawback of the original TV was that it did not have a stereo sound output, so the TV did not use the very nice built-in speakers in the coach.  I did a fair amount of research into various options for getting the TV on the speaker system, and found a JVC car stereo which had auxiliary microphone inputs on both the front and rear of the unit.  This gave me a way to hook the TV into the rear of the stereo without exposing the cables.  By running a headphone cable from the TV to the rear of the new stereo, the TV and DVD player were now hooked into the coach sound system, using all four speakers!  What an improvement.  The old Kenwood stereo had a broken display so you could not read the front panel.   The new JVC unit took care of that problem as well.

Ironically, the mono TV actually came with an enhanced sound controller of its own, which featured a wall mounted “equalizer” and an amplifier behind the VHS player.    I removed the “enhanced sound system” from the original TV and ran new stereo cables from the VHS to the rear of the TV, so we now have four-speaker stereo for all the audio/video components: TV, DVD, VHS, and Radio.

I found a “refurbished” deal for the JVC radio on Amazon for less than $50.

New JVC Stereo with aux TV input in rear

(Refurbished-like-new items at Amazon are usually open box new items, so you can save quite a bit and still get a new item.)  The TV was about $130 and the mounting bracket was about $15, so the whole upgrade only cost about $200.  As a bonus, a lot of space was freed up in the upper cabinet when the original TV and amplifier were removed, so there is a lot of extra storage we use for pillows, towels and other bulky light items.

Since the new TV came with a built-in DVD player, I decided to leave the original VHS player in place.  Amazingly, the player still works pretty well, and the VHS picture on the HD TV is much enhanced over the old low resolution TV picture.  We have maintained a tradition on our camping trips of watching a movie almost every night, and we have an unlimited supply of VHS tapes available at the thrift stores for about 25 cents each.  Many of these shows become “one and done” and find their way to the trash after viewing, but it’s cheap entertainment.  We also watch some movies on DVD and occasionally “binge-watch” a TV series on DVD as well.


New Monitor Panel (Clock, Indoor/Outdoor Thermometers and Battery Voltage

I removed the old now useless audio control panel in the wall, and used the hole to mount a new monitoring device.

Indoor Outdoor Thermometer and Battery Voltage Monitor

The monitor includes a digital clock, indoor and outdoor thermometers and a battery voltage readout for monitoring battery charge.  This unit was a near-perfect size for the opening and has a selectable backlight in blue or orange (or off if you put the switch between.)  The outdoor thermometer has a probe, which I mounted in the outside shower compartment.  I spliced the battery monitor 12V (previously a cigarette lighter-type power cable) into the 12V feed used by the TV.


Monitor Panel Orange backlight
New monitor panel next to TV

I cut the external thermometer wire which was too short and difficult to route outside, and spiced the cut ends to a small section of phone cord with modular connectors.  This allowed me to use the original Chinook telephone jacks in the outside shower compartment and inside the overhead compartment to connect the outside thermometer sensor to the wall mounted unit without running a new wire.

Front Cab Electronics Upgrade (new all-in-one head unit)

Our initial driving experiences illuminated a desperate need for a backup camera and display.  Blind spots on the sides are one thing, but the backing up view is non-existent below the rear door window.  I also wanted a reliable GPS navigation system which also had a display requirement.  After a lot of thought and research, I decided that an “all-in-one” head unit could provide a common display unit for all of our needs, as well as provide a radio, CD and DVD player, and future needs as well (Bluetooth, XM radio, etc.).   Heading back to Amazon, I found a few choices, but settled for a Pyle PLDNV78I head unit for under $200.  This head unit has inputs for a backup camera, and auxiliary audio/video, and incorporates AM/FM/CD, GPS navigation, and MP3/USB/IPhone and other features.  There are many similar units available today and I probably would have gone with a better unit, but it actually does everything I wanted for a great price.  The built-in GPS uses a probably pirated copy of the IGo Prime navigation software, but they worked out a deal, so you can get updates from Pyle, but not from IGo.   This is a little annoying but not a big deal.  The navigation software is actually quite powerful, but like any GPS system, it may lead you astray if you are not vigilant.

I coupled the head unit with a $20 Pyle backup camera which I mounted underneath the rear step.  I tapped into the backup signal from the left rear taillight in the cabinet behind the rear tire.  I drilled a small hole through the carpet in the cabinet to run a signal wire from the backup light wire to the new camera.  I ran a CAT-5 (4 twisted-pair Ethernet cable) from the transmission hump to the rear bumper, along with a single wire for power and a video extension cable for the backup camera.  The video cable was too small for its length and there was not enough signal for the camera display, so I abandoned the cable.  Instead I was able to splice into some wires the CAT-5, which carried the video with plenty of signal.

Original Radio Removed

I drilled a hole in the cab floor where the rubber gasket of the engine cover sits, for the wires to come into the cab.  The I ran them behind the driver dash into the radio cavity for hooking into the new head unit.  I used a video splitter cable for the rear view camera video, and connected one signal to the rear view input of the head unit, and I connected the second feed to the Aux Video input of the head unit.  This allows the rear view camera to come on automatically when the transmission is in reverse, and also allows me to select the rear view display at any time using the touch screen to select the aux video for display.  Wiring the backup camera was definitely the hardest part of this do-it-yourself installation, but it is working.

The Ford E350 from that era has a radio that is close to, but not exactly a double-DIN form factor.  I found a you-tube video of a double-din installation in a Ford truck, and it is actually not too difficult.  The Ford opening is a little wider, and not quite tall enough.  A Metra 95-5817 Double DIN Installation Dash Kit provides an attractive frame, and some dremel trimming of the bottom plastic surface inside the opening makes for a “factory-installed” appearance of the new double-DIN head unit.

New Head Unit (Radio/GPS/Backup Camera) with Sun Shade

Once installed, the new display suffered from a lot of glare interference.  This is mainly due to the angle of the dash and any display is likely to have the same problem.  I found a “glare-stomper” sun shade on Amazon for about $20 which provides shade for the display, and the problem was solved.  The glare shield attaches to the dash with some high-bond tape, and is adjustable with Velcro straps.  The readable display obtained is well worth the cost and inconvenience.

Off-the-shelf bathroom improvements

I continued searching for ideas on the Internet and found a couple of bathroom ideas.  World Market sells a bamboo bath mat that is the exact size of the shower floor.

Bamboo Bath Mat from World Market

The mat makes a more attractive and comfortable surface, and allows dust and dirt to wash down the drain below without sticking to your feet in the shower.  The original plastic shower curtain was also replaced with a simple cloth one, mainly to eliminate the “clammy” feeling of the plastic in the confined shower space.  The cloth absorbs the moisture rather than repel it, but we wring it out and it dries fairly quickly in the RV environment.


A second simple upgrade was an Oxygenics BodySpa”  shower head, designed to create additional pressure from air flow.  This shower head provides better performance when using the relatively low pressure RV water pump.

Oxygenics BodySpa Shower Head

The new shower head was also much more attractive than the original yellowed shower head.  I was concerned at first that the RV shower heads do not shut off the water flow completely when the flow at the shower head, but I found out this is a “feature” not a bug, so that the water maintains the desired hot and cold mixture while you are soaping up between rinses.  The original shower head worked the same in this regard.


Chinook Owner Internet Resources

The Chinook Owners Group forums on the Internet are great sources of information for all matters related to Chinooks.  There are also a few individual Chinook bloggers like mine with more good ideas for improvement ideas.

These web sites are invaluable for anyone that owns a Chinook RV or is thinking of buying one. They are full of resource information like manuals, and contain solutions to almost every problem owners have encountered with their units.  There are also many ideas for improvements, many of which I have included in my own restoration and maintenance projects for Harmony.

Here are some links:

IO (old Yahoo) Chinook Owners Group (oldest and most extensive): Chinookrvowners@groups.io | Topics

Chinook RV Forum (newer with easier organization and growing all the time):

http://www.chinookrvforum.com/index.php

Chinook RV Club:

http://www.chinookrvclub.net/

Bloggers:

http://chinookconcourse.tumblr.com/

Facebook – Now the most popular resource:

(1) I Love My Chinook RV | Facebook

(1) Chinook RV Owners Forum | Facebook

Restoring the Chinook – Practical Improvements

After a long search for the perfect RV, making an offer sight unseen, and flying to Oregon to bring her home, Harmony, our 2001 Chinook Concourse XL sat proudly in our driveway.  She was a bit of a guilty pleasure.  It is common knowledge that an RV spends most of its time sitting in a driveway or in storage, so it hardly seems like a wise investment.  With those thoughts, I was pretty money conscious about putting a lot of money into my new hobby.  (For the record, now that we have enjoyed our Chinook for some wonderful trips, I think the purchase was actually a fantastic investment.)

At any rate, I had the winter ahead and six more weeks of work before we could plan for another trip, so I set my focus on restoring the Chinook to her former glory.  Fortunately, the Chinooks were top of the line in their day and the 2001 was in the golden age of the Chinook brand.  The quality of the vehicle and the interior cabinetry was excellent, although the condition had deteriorated during the years of light use and storage.  In other words, the Chinook had “good bones” as one might describe a fixer-upper house.  There were also some significant technology improvements since 2001 that could be integrated to make the RV better than new.

We were fortunate that the previous owners had not made any major modifications, so we started with a configuration pretty close to what left the factory.  The woodwork finish, especially the wine cabinet/dining table were in dire need of refinishing.  Fortunately I had considerable experience refinishing furniture, and the “golden oak” woodwork is my favorite.

However, my first purchase was a replacement for the brass Coca Cola bottle opener that had been removed for some reason.  The bottle opener was almost a trademark Chinook feature.  Perhaps the original owner kept it as a memento of his Chinook experience.  At any rate, an authentic bottle opener was found on eBay, and I got it for about $15.

Classy and Functional

It sounds silly, but the bottle opener has been a very useful appliance and I have used it many days on the road, usually for opening a cold imported beer following a long day of driving.  Its utilitarian value and the convenience of its location right across from the refrigerator is just one example of the amazing attention to detail Trail Wagons put into their product.  At any rate after seeing it prominently displayed in so many Chinook interior photos, I was disappointed to see it missing and happy to see it replaced.

Our brief experience driving the Chinook home to Santa Barbara identified some immediate needs for improvement.  First was a better console for the cab.  One of the coolest advertised features of Chinooks in our vintage included heated and cooled cup holders in the front console.  The usefulness of the hot and cold was diminished by the fact that you needed “special” metal travel cups to take advantage.

Original Chinook Console with hot and cold cupholders
Original Chinook Console with hot and cold cup holders

I think soda cans would work but I never found out.  Unfortunately, the console was a modified version of an already tiny console, with some venting required to keep the cup holders from overheating.  In our case one of the vents was damaged.  But the biggest problem was that we could not put anything on the console (e.g. cell phone, GPS) without having it slide off onto the floor (or more likely, dangling from the charge cord).  There are two 12V charging ports available on the dashboard, but both are on the driver’s side, so the cords are draped across the console getting in the way.  I wouldn’t have thought of replacing the console, except I had seen in my Chinook research that many owners had found cheap and better replacements on the Internet (thank you eBay).  It turns out that Ford has stuck to the same console mounting brackets in their E-350 from the late 90s to the present, so several different styles had been produced during those years.

Our new Ford console

It was also common for shops to replace the factory console with a customized version, especially in RVs, so the factory “takeoffs” were generally available for (at the time) about $50.  I was lucky to find just such a deal, a 2014 version on eBay for about $50.  It was one of the last ones I have seen for sale, and the price for consoles now has risen to more like $150 or more, due to the declining use of the E350 platform for RVs (thanks to Sprinter and the like).


The new console was a huge improvement, providing three fully functional cup holders, and numerous bins and cubbies to hold all of our paraphernalia.

The third item to be addressed was the need for additional convenient charging ports in the cab.  The new console and the original wiring for the drink heater/coolers provided a perfect opportunity to add charging ports to the console.

New charging ports mounted in new console

I found a nifty Charging Port device on Amazon, which took a 12V input and provided two USB charging ports as well as two more conventional 12V (think cigarette lighter) ports.  Here is a link: https://www.amazon.com/gp/product/B000PB8CQI/ref=oh_aui_detailpage_o04_s00?ie=UTF8&psc=1  I mounted the device inside the new console, which had a nifty shelf inside the main compartment, and connected the input wires to the 12V wires behind the console which used to feed the cup holders, and our charging port and wiring problems were solved.  All the cords would now originate inside the console, and stay mostly out-of-the-way.  I found some electric travel cups that have built-in heating elements that plug into the 12V sockets, so I could get back at least half of the hot and cold cup holder feature.  I have found that the heater is pretty unnecessary. since an insulated cup holds heat longer than it takes to drink a cup of coffee.  The cooling function could have been valuable in a more desirable housing, because the E-350 transmission gets HOT especially when mountain climbing, and the console rides right on top of the transmission.  Cold drinks warm up quickly in the cab.  Often, I will put some bottles of water in the freezer, and let them thaw out in the cup holders while driving, to provide some cold water in the cab on hot drives.


First Trip – Bringing Harmony Home – Conclusion

Our first night in the Chinook was also our first boon docking experience and our first night of “stealth” camping, as we parked in a parking lot off the highway in Madras, Oregon.  We weren’t familiar with using the light-blocking curtain we found in the cabinet, but simply draped it as best we could across the rear of the cab, and turned out the lights early.

Not surprisingly, we woke up early, around 530am.  More surprising was the cold, and the temperature had fallen to the high 20’s overnight!  Shivering a little in our fair-weather sleeping bag, we decided to get up and on the road right away.  Soon we found ourselves back on Highway 97 headed to Bend and points south.  We stopped to visit the High Desert Museum south of Bend, but it was so early the museum didn’t open for hours.  We had taken a car trip through the area in 2004, and were very impressed with the museum, which offered an amazing exhibit with baby owls in the nest.

The temperature had climbed to the 30’s but that was plenty cold outside.  We encountered patches of fog in the hills, and were astounded to see a large buck on the side of the road in the fog ahead of us.  It was like a scene from a fantasy novel, the deer in the fog, looking at us then loping away.  Something we will always remember from this trip.

As we came through the gap to Klamath Falls, we took a side trip to see the Klamath Marsh National Wildlife Refuge.

Klamath Wildlife Refuge

We hoped to see some eagles and other birds, but were a little disappointed.  The marshes were expansive, but there were no trees to speak of, and the grass was brown, with some canal-like creeks meandering through.   We saw a few ducks, but that was it.  We drove on a gravel road through the refuge, which was so bumpy it rattled our teeth.  The road had become like a corduroy log road, and the Chinook seemed to bounce with every rotation of the wheels.  (We later found out our shocks were completely worn out which added to or might have been the cause of the poor ride.)

Back on the highway, we passed into California and drove through Weed, which had recently suffered a huge forest fire.

Weed Forest Fire Cleanup

We passed through a lot of burn area, and then came upon the majestic views of Mount Shasta, one of a chain of volcanos ranging from Mount Ranier in Washington  to Mount Lassen, just to the southwest in California.

imag0321We stopped at a lookout point for Mount Shasta and took some pictures, some of our most memorable of the trip.  The day had warmed up considerably, and we were enjoying the drive.


At our next gas stop, we switched drivers, as Beth wanted to get some experience driving the Chinook.  She did fine, but was a little nervous about turns and lane changes, as was I.  She has left the driving to me since then, mainly because I enjoy it more.  She could certainly drive the Chinook if she had to, and since we learned to adjust the mirrors and installed a backup camera, a lot of the uncertainties are mitigated.

imag0335
Beth at the Fish Hatchery
imag0336
Coleman National Fish Hatchery
imag0334
Another Chinook

We passed up an opportunity to visit Mount Lassen, but we did make a side trip to visit the Coleman National Fish Hatchery, near Anderson, California.  The hatchery is located along a tributary of the Sacramento River, and its purpose is to expand fish populations of several species, to the tune of over 13 million hatchlings per year.  Our favorite species was the Chinook!  The Chinook fish is a type of Salmon, the King Salmon.  Other Chinooks include a wind and one or more towns, including a harbor town of Chinook in Oregon.


Since we had a taste of “free” camping, we were now reluctant to pay for a place to park.  As dark approached, we pulled into a rest stop off of Interstate 5, hoping to stay for a few hours of sleep.  After we parked and used the facilities, a car with a small trailer pulled in next to us, carrying along a smell of marijuana with its inhabitants.  A rest stop attendant asked us if we knew these people, which of course we did not.  It seemed a little creepy to stay there after that, so we started up again and headed down the highway.  It turned out that rest stops were sparse after that, and we drove considerably further that evening than we anticipated.  As we queried Google maps “Find Rest Stop”, we were finally rewarded with the “Hunter Hill Safety Rest Area” in Vallejo, CA.  The driving had become quite hectic and stressful by the time we arrived at the rest area, since we were now in the North Bay area freeway system.  It was relief that we stopped finally for the night.

I had a revelation during the day regarding our privacy drape, and realized there were button snaps on it and there were corresponding snap locations in the ceiling and walls of the cab area of the Chinook.  It turned out the drape was in fact designed for the purpose we had crudely attempted the night before.  Once snapped in place, along with a tiny counterpart snapped over the rear window of the camper door, we were snuggled in stealthy privacy.

The next morning provided some urban freeway driving experience as we crossed the northwest tipoff the bay toward Oakland.  Hungry for breakfast, we were rewarded by our “Find Black Bear Diner” request with a convenient location in Emeryville.   After a hearty breakfast, we continued south.

We had some extra time to get home, so we decided to head for the coast for a more interesting drive.  We turned west at Salinas and drove toward Monterey and California Highway 1.  We decided to travel the famous 17-mile drive through Pebble Beach, since it had been many years since we visited that coast.

Point Joe at 17 Mile Drive

Our first photo stop in the 17 Mile Drive was at Point Joe, a particularly turbulent piece of the Pacific.

The real Point Joe
  The real Point Joe

While we were enjoying the break, we stumbled across some odd pellets under the passenger seat of the Chinook, which turned out to be rat poison!  This evidence of a past rodent infestation was later corroborated by some nesting materials found later.

Harmony at Point Joe
Pebble Beach Golf Tee in the Rocks
17 Mile Drive
17 Mile Drive

Disgusting as it sounds, the rats probably helped save us quite a bit of money on our purchase price, so we probably owe them a favor.  At any rate, there were no current specimens on board, so we disposed of the poison pellets and continued the 17-Mile drive.

Once we returned to the highway in Carmel, we drove the fabulous Big Sur coastal drive toward San Simeon and Morro Bay.  Driving the Chinook on the twisty road down the coast was surprisingly easy.  The steering was very responsive and the powerful engine had no trouble with the mountain climbing.  There were a number of turnouts to day use areas and campgrounds that did not look inviting to an RV,  but we could see many bigger campers on the road and at some of the turnouts.

Just north of San Simeon (home of Hearst’s Castle), we stopped at a beach full of elephant seals, basking.  Some of the males were strutting their stuff, along with some amazing bellows.  We watched for a while, fascinated, and continued toward home.

Pacific Coast near San Simeon

The rest of the drive was pretty, and uneventful, and we arrived home in Santa Barbara in the late afternoon.  We are blessed to live in one of the most beautiful seaside locations around, so any drive to or from the north is a scenic delight.

All in all, we were very pleased with our purchase and our pleasant first trip driving back home in the Chinook.  We knew we had made the right decision in our quest for an RV.  Now it was back to my last two months of work, and making plans for the future.


First Trip – Bringing Harmony Home – Day 1

Pasco Night View from the Hotel

I obtained some “free” airplane tickets to Pasco Washington using miles, and we flew up the night before our purchase appointment at Smiley RV in Milton-Freewater Oregon.


We picked up a rental car and spent a nice night at the Clover Island Inn on an island on the Columbia River.  We got up and made the one hour drive to the dealer the next morning.

Pasco Hotel Columbia River

We arrived at the Smiley RV with feelings of eager anticipation and potential dread at the same time.  However, our fears were unwarranted.  The Chinook was in good shape and the dealer had done a good job preparing the unit for sale.  They replaced the kitchen faucet, and installed brand new house batteries.  Our technician Kirk gave us a pretty good tour, and gave us some tips about operating the various appliances and utilities.  After an hour or so of instruction and completing the paperwork, we were ready to travel.

It was with some nervousness that I took to the road in the Chinook, with my wife following in the rental car, headed back to Pasco to turn in the rental.  The GPS was quite confused in that rural location, and led through a winding back-road route, which eventually got us to Pasco.  The good news was that I had a chance to get some driving experience on rural roads with little traffic.  The Chinook is basically a small truck, so driving it is similar to driving a U-Haul type vehicle.  It’s not too difficult, but visibility is much more limited than when driving a car.  Mirror adjustment is critical, but that is something we learned later.  For this trip every turn and lane change was a bit of an adventure.  The Chinook is very powerful, given it’s big V-10 engine, but it still takes some effort to get going and to stop, so you need to give yourself as much room as possible to avoid any white-knuckle experiences.

We stopped at a gas station in Pasco to fill up the rental car and top off the Chinook. Our first gas stop! I was a little apprehensive about pulling the “truck” into a gas station, but it turns out to be no big deal.  The shorter turning radius of the Concourse is a big benefit for maneuverability, so that driving is more car-like.  It is easy however to forget the rear overhang which is still easy to bottom out on driveway entrances or other, even minor, gullies.  The trick, we learned a very hard way (to be discussed in a future blog) is to approach any dip at a 45 degree angle, rather than 90 degrees.  This allows the Chinook to straddle the dip one wheel at a time, and there is no dramatic down and up to snag the trailing rear end.

We stopped at a Walmart to buy some pillows (we had packed sleeping bags for the return trip).  Another quick driving lesson: Don’t try any fast moves in and out of the parking lot (or any other turns for that matter).  With every hard turn, everything on the shelves and counters in the back would get a jolt, creating a pretty scary bunch of rattles.  Patience is the key, and wait for an opening where you can get out with slow acceleration (which is all the Chinook is capable of when starting to move.)   We learned later that our suspension was not up to snuff (bad shocks), so driveways and bumps were much more dramatic than they are now with everything repaired.  At any rate, we took care of our domestic needs and returned to the highway.

We drove down the Columbia River using Interstates 82 and 84 towards Portland.  It was a pretty drive, but there was a terrific crosswind, which made the drive a little more noisy and bumpy than normal.  This part of the Columbia Basin is close to a Windsurfing mecca, which was explained by the strong steady wind.  Rather than head all the way to Portland and the coast, we turned off on Highway 97 to the south, through central Oregon.  This became a typical scenario for us, to avoid the Interstates and travel on secondary highways, which generally are more scenic with less traffic.  The powerful Chinook engine allows us to keep up with almost all traffic in most conditions, or we can drive at a more leisurely pace, when the road is clear.

At a stop in Oregon
At a stop in Oregon

We had planned to stop near Bend, OR for the night, but we got off to a little bit of a late start, so we stopped for dinner in Madras, a few miles north.  We found a Black Bear Diner on the highway through Madras, and parked in a residential parking lot next to the diner.  What a great restaurant!  After this first experience, we have sought out Black Bear Diners in may locations on our trips.  Wherever we are in the west and looking for a good breakfast or dinner spot, we open Google maps and say “Go To Black Bear Diner” and the search list will identify the nearest location, if any.

Our first Black Bear Diner

We finished dinner about 530pm and it was starting to get dark, since it was mid-November.  We got in the camper, looked at the time, and thought, “Why don’t we just stay here for the night?”  So we did.  Our first night in the Chinook turned out to be our first night of “stealth camping”.  We put down the shades and left all the lights off.  We went to bed at 630pm, because we didn’t want anyone to know we were there!

I was concerned about the sleeping conditions, since I had foregone the dinette floor plan which allowed the dining benches to combine with the jack-knife sofa to make a king sized bed.  I was hoping the jack-knife was big enough for the two of us to be comfortable, and thankfully, for us it was great.  I was so happy with the decision, since the club chairs were more comfortable than benches, and the coach was much more roomy, especially at night with the bed opened.  In fact, the bed was surprisingly comfortable, and we went to sleep even at that early hour without incident.

All in all, it was a great day.  We loved the Chinook, and all of our purchasing fears were assuaged.  The engine was solid, the coach was very comfortable, and even as rookies, we had managed several hundred miles of progress without any problems.


Buying a Chinook

With retirement approaching in a few months, I started perusing Craigslist RV ads. One of my long-term retirement goals was to travel the country with an RV, something our parents had enjoyed in their early retirement years. In the back of my mind, however, I realized that a large majority of RVs spend almost all of their existence parked in a driveway or storage. Being frugally minded, I felt some guilt over spending a huge amount of money for a toy that would not be used often. My other RV concern was about size. I had some fear in driving a large vehicle, and I was concerned that the larger the vehicle, the less likely it was to get used. Basically, I was looking for a cheap RV that was relatively easy to drive and could park in a normal parking space. I also seem trailer-impaired, in that my limited experience backing up with a trailer seemed very difficult and not something I wanted to deal with. This pretty much ruled out a camping trailer or towing a car behind the RV (TOAD) for local excursions. I didn’t want a pickup and camper because I wanted access to the camper from the driving compartment. We had camper shells in my youth, and they were much improved over tent camping but not much.

After weeks of scanning Craigslist ads, it seemed that what I was looking for was something around 21 feet long, either a Class B (van) or small Class C (cutaway chassis with camper cabin attached). There were very few Class C’s under 22 feet. Most common were RoadTrek Class B’s and more recent Sprinter Vans (very expensive). Another seemingly attractive choice was Rialta (Volkswagon-based). Then I saw a 21 foot Chinook Premier. It was like Goldilocks, not to big, not too small, not too expensive (it was early 2000’s model), and it was loaded with luxury. The ad lasted for weeks, and I kept returning to see if it was still for sale. At the same time, I started researching the Chinook history and found out they went out of business in 2005, so there were no new current models. I also found out they were the Cadillac brand of RVs, costing close to $100,000 at the turn of the century (2000’s) when that was a lot of money at the time. (Bigger Chinooks cost even more). I also found out the Premier, luxurious as it was, was the “low-end” model, and the similar sized Concourse was even more luxurious.

I started focusing my search to Chinook Concourses, which now seemed no more expensive than the Premiers. I searched ads all over the country and found out they were rarely available, with prices ranging from the high $20,000s to as high as the $40,000s. (All of them were at least 10 years old by late 2014 during my search. Most ranged from the mid-90’s to early 2000’s, which was probably the “Golden Era” for Chinook.) I decided I wanted a something no older than 2000, and priced below $30,000. I found out there were three floor plans made: an unacceptable (to me and my wife) and most-rare twin-bed, a dinette plan, and a club lounge (with two barrel chairs, and a fold-up table).

Jackknife Sofa
Jackknife Sofa
Club Lounge
Club Lounge

The main bed is a folding jack-knife sofa (except for the twins), and the dinette had a sleeping advantage in that the seats joined with the sofa bed to make a huge king-sized “mattress”. However, the club lounge was more open and seemed a lot roomier and comfortable for daytime use. Eventually, I settled on the club layout, hoping that the Jack-knife sofa was big enough and comfortable enough for me and my cuddly wife to sleep on.
(Spoiler, for us the jack-knife sofa bed has been wonderful, big enough and comfortable, so I was very happy with the club layout we wound up with.)

One day, an ad appeared, and I couldn’t believe what I was seeing, a beautiful 1999 Concourse for $5000! I am embarrassed now by my naiveté (as in INTERNET FRAUD unawareness), but I was excited. It felt like an opportunity to save $20,000! I contacted the seller with questions, how many miles, safe-to-drive, etc. he responded with a long story, even better than I hoped. I will post his response here as a lesson to any Internet car shopper:

“I’m glad that you are interested in buying my 1999 Chinook Concourse. The RV has been extremely well maintained with a full service history, and has not been involved in any accidents. It only has 75000 miles on it and the title is clear. I bought it when I was serving at Hill Air Force Base, Utah but I was promoted and transferred to Elmendorf AFB in Anchorage Alaska for a 2 year period, so I do not want to let it rot in my backyard and therefore need a fast and reliable buyer. The RV is already at our Department of Logistics at Hill Air Force Base, Utah crated and ready to go. The shipping will be free for you because I will transport it using the internal transport system we have here at the Department of Logistics! The DoL will deliver the RV to the nearest Air Force Base from your area and from there I will use a tow-truck to have it delivered to your door. The whole shipping process will take 3-4 days. The financial part will be managed by eBay, which means you will have a 5 day inspection period before committing to buy the RV. In this way, both you and I are 100% covered during the steps of this transaction. I would really like to get at least $5000 so if you are interested in making this purchase in a timely manner email me your: full name and shipping address, so I can inform eBay that I have a buyer! I will forward your details to them and then you will receive the invoice.”

I was so excited, it seemed (and was) way too good to be true. He offered more pictures, so I asked him to send them. They looked fantastic… and familiar? The license plate was from Pennsylvania (not Utah), and I realized they were the same pictures I had seen from an ad from a dealer in Pennsylvania. I was crushed and embarrassed at the same time. I pointed out the pictures were from another Chinook and asked “what’s going on?”, (knowing what was going on by that time.) I never heard any more from the “seller”, but I did get a couple of phishing emails requesting bank and ID information a day or two later. At least I knew enough not to provide any confidential personal information, but it was amazing how much trouble one would go through to get a bank account number or other opportunity for fraud, not to mention $5,000.

Although embarrassing, I am appreciative of the life lesson, and hope this story might help someone else. Normally, I am pretty cautious and I didn’t let this get out of hand, but I am amazed at how gullible I could be when tempted by something I really wanted (by that time).

So I intensified my search, now armed with what I knew to be fair prices for Chinooks. By now, my wife was on-board, and she spotted a nice Concourse up for bid on EBay for about $25000. I came close to making an offer, but deferred at the end, partly because it was a dinette model, and I was leaning toward a club lounge layout. It was now October 2014, and I later learned is prime buying season, after reluctant sellers have made their “one last trip” in the fall. Surprisingly, there are some really wonderful units out there, if you are willing to be patient and diligent in your search. In spite of their age, one unit have shown up with less than 20,000 miles, and a few still have less than 100,000. I had decided I wanted one with less than 80,000, but fewer was desirable. Prices in the few ads seemed to be in the low to mid $30,000’s, but occasionally one would sell in the $20,000’s like the one on EBay, but none seemed quite right, until…

A 2001 Concourse with 56,000 miles showed up in the RV Trader ads, marked down from $29,999 to $27,999. It was a dealer, Smiley RV, in Milton-Freewater Oregon. It looked a little worn on the inside, but looked like a fair deal. I sent a message to the seller, asking for more information (does everything work? is it safe to drive?). I didn’t get a reply, but it was still there a couple of days later, so I sent a second message, going for broke: would you take $25,000 cash for the Chinook? No immediate reply, but a couple of days later, I received this reply:

“Hi Clay,
Your offer is great and is acceptable …”

Holy Cow! This could be it! I sent back a reply, saying I was excited and sent him a copy of our bank loan guarantee and said I would have to arrange travel and financing and asked for details I needed for my loan application. He replied with a Purchase Agreement, and I had to do a whirlwind of activity to arrange for pick up. I finished up the loan paperwork and arranged to have the loan check sent to him directly as a down payment. I made reservations for free one-way airplane tickets from Santa Barbara to Pasco Washington using miles to pay, and got a hotel and car rental reservation in Pasco. Pasco is about an hour drive from Milton-Freewater, but the nearest United destination. I told Tim I would be there to pick it up the following Thursday morning, and we would drive it back to Santa Barbara. He wasn’t too happy it was so soon, because he needed more time to prepare it, but he was agreeable, assuming he got his check and we brought a cashier’s check for the balance.

Pre-buyer’s second thoughts. Now that we were committed, I started to worry that this might be a mistake, buying a 14-year-old vehicle sight unseen over the Internet for $25,000. I took to Google Maps to make sure Smiley RV existed in the place it was supposed to be. A good sign when a Google street-view of RV lot showed the same sign that appeared in one of the Chinook pictures. Then doubts crept in about the Chinook itself. Some of the pictures on-line were a little washed out…was the upholstery stained, or was it just the lighting? Then my wife has to ask, What if it smells like cigarettes? Then I made the mistake of checking into Google reviews of Smiley’s, and found an entry not just criticizing Smiley’s but completely trashing the very Chinook I was about to buy. It turned out another less-serious Chinook shopper saw the Chinook advertised and decided to stop by to see while on a trip in the area. He called ahead but his no one got his message, so he arrived without notice. He already had “an attitude” and was highly critical of the Chinook, to quote:

“…I suspected arrogance and I was right.
When I saw the “motor home” ( Chinook ) it was total crap. The most dirty interior I’ve ever seen, it even stunk. The back bumper was crunched ( notice it’s left out of the picture on the website) . The paint and clear coat are peeling. I could go on and on.”

I didn’t share this nasty bit of information with my wife, as she was already a little skeptical. And so it was we headed for Oregon with a mixture of excitement and terror in our heads about our new RV adventure. As it turned out, we couldn’t have had a better experience with Smiley’s people. They had gone over the unit extensively to prepare it for sale. They put in new batteries, a new kitchen faucet, filled the propane tank and tested all the appliances, and had professionally cleaned the carpets and upholstery. There was some peeling clear coat, and some minor dings, but these are common conditions for RV’s of that age, and just cosmetic and fixable. We got a very informative demonstration of all the unit features, which are extensive and fantastic.

We finished the paperwork, and took to the road in our new (to us) Concourse and our first RV experience. We managed the 1200 mile drive back to Santa Barbara without incident, learning more and more about the Chinook as we drove. Basically it is a fantastic vehicle, both a fully equipped tiny home and a powerful reliable truck, with the Ford E350 chassis and 6.8L V-10, which is totally unstressed on a rig that size.

We were completely impressed with the comfort and driveability, even though (as we found out later) the shocks were shot and the tires old. The price was fair to both the buyer and seller, as it was discounted, but also pretty worn and in need of refurbishment and upgrades, which I can discuss in future blogs. But the Chinook is an extremely high quality RV, and luxurious and well designed for all types of camping. The finished oak cabinetry is exactly right for our tastes and gives us the feeling of a mansion on wheels or the feeling of a luxury yacht.

We named her Harmony anticipating the many pleasant and exciting adventures we will have together.

Chinook Concourse RV

One of my retirement pursuits was to buy an RV and travel the country. So, I began searching a few months before retirment, and bought our dream RV “Harmony” on November 6,2014 in Milton-Freewater, Oregon. Harmony is a 2001 Chinook Concourse, which started with about 56000 miles when we took over. This blog will discuss the searching process, purchase, restoration and upgrade, and travels in Harmony, which have all been a delightful experience so far.

Harmony was named after our 40+ year marriage. Beth and I have grown together throughout this time, and are enjoying our increased time together since retirement. Our travels in the Chinook are becoming a great source of peace and happiness ase we see new sites and experiences together

Introduction

Greetings Friends,

Welcome.  I am Clay Rushing and this is my retirement blog.  I retired in January 2015 from a rewarding and fascinating career in software development, and find myself in a blissful state of no deadlines and few worries. But I have a lot of ideas and experiences that feel a need to be shared, so this is outlet.

Here are some topics to be explored, in no particular order:

Retirement, Economics, My 2001 Chinook Concourse RV, Animals and pets, Progressive ideas, Projects around the house, Travel, and whatever else strikes my interest.

Anyway, here is the launch, and we will see where it goes…